> ## Documentation Index
> Fetch the complete documentation index at: https://docs.coderabbit.ai/llms.txt
> Use this file to discover all available pages before exploring further.
# Add organizations
> Learn how to add new organizations to CodeRabbit and grant the necessary permissions to enable code review across your organization's repositories.
Adding organizations to CodeRabbit allows you to extend code review capabilities across repositories within your organization. You can start this flow from the organization switcher when you add an organization, or when you select an organization that does not have repositories connected yet.
## How to add organizations
Follow these steps to add a new organization to your CodeRabbit account:
Go to [app.coderabbit.ai](https://app.coderabbit.ai) and ensure you're
logged in to your account.
Click the **Refresh** button next to your organizations list to check for
new organizations that you have access to. 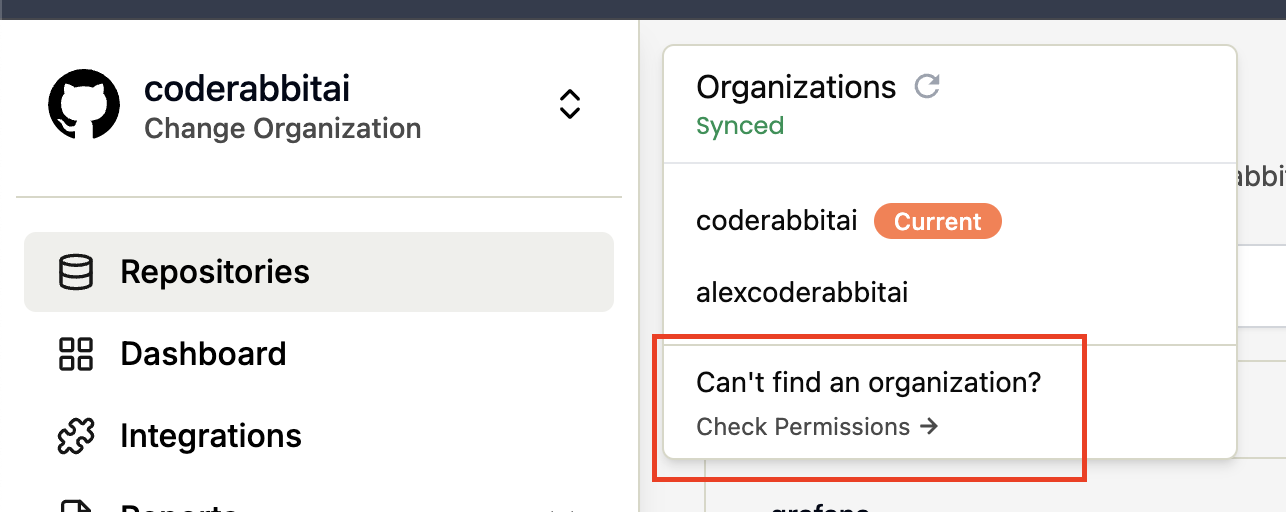 If a newly added organization or its repositories do not appear immediately after you return from GitHub, use **Refresh organization list** again or retry the add flow. CodeRabbit preserves your place while setup is active. If setup is not completed promptly (about 30 minutes), restart **Add organization**.
Find the organization you want to add in the list of available
organizations.
Click the **Grant** button next to the organization name to authorize
CodeRabbit access.
If a newly added organization or its repositories do not appear immediately after you return from GitHub, use **Refresh organization list** again or retry the add flow. CodeRabbit preserves your place while setup is active. If setup is not completed promptly (about 30 minutes), restart **Add organization**.
Find the organization you want to add in the list of available
organizations.
Click the **Grant** button next to the organization name to authorize
CodeRabbit access. 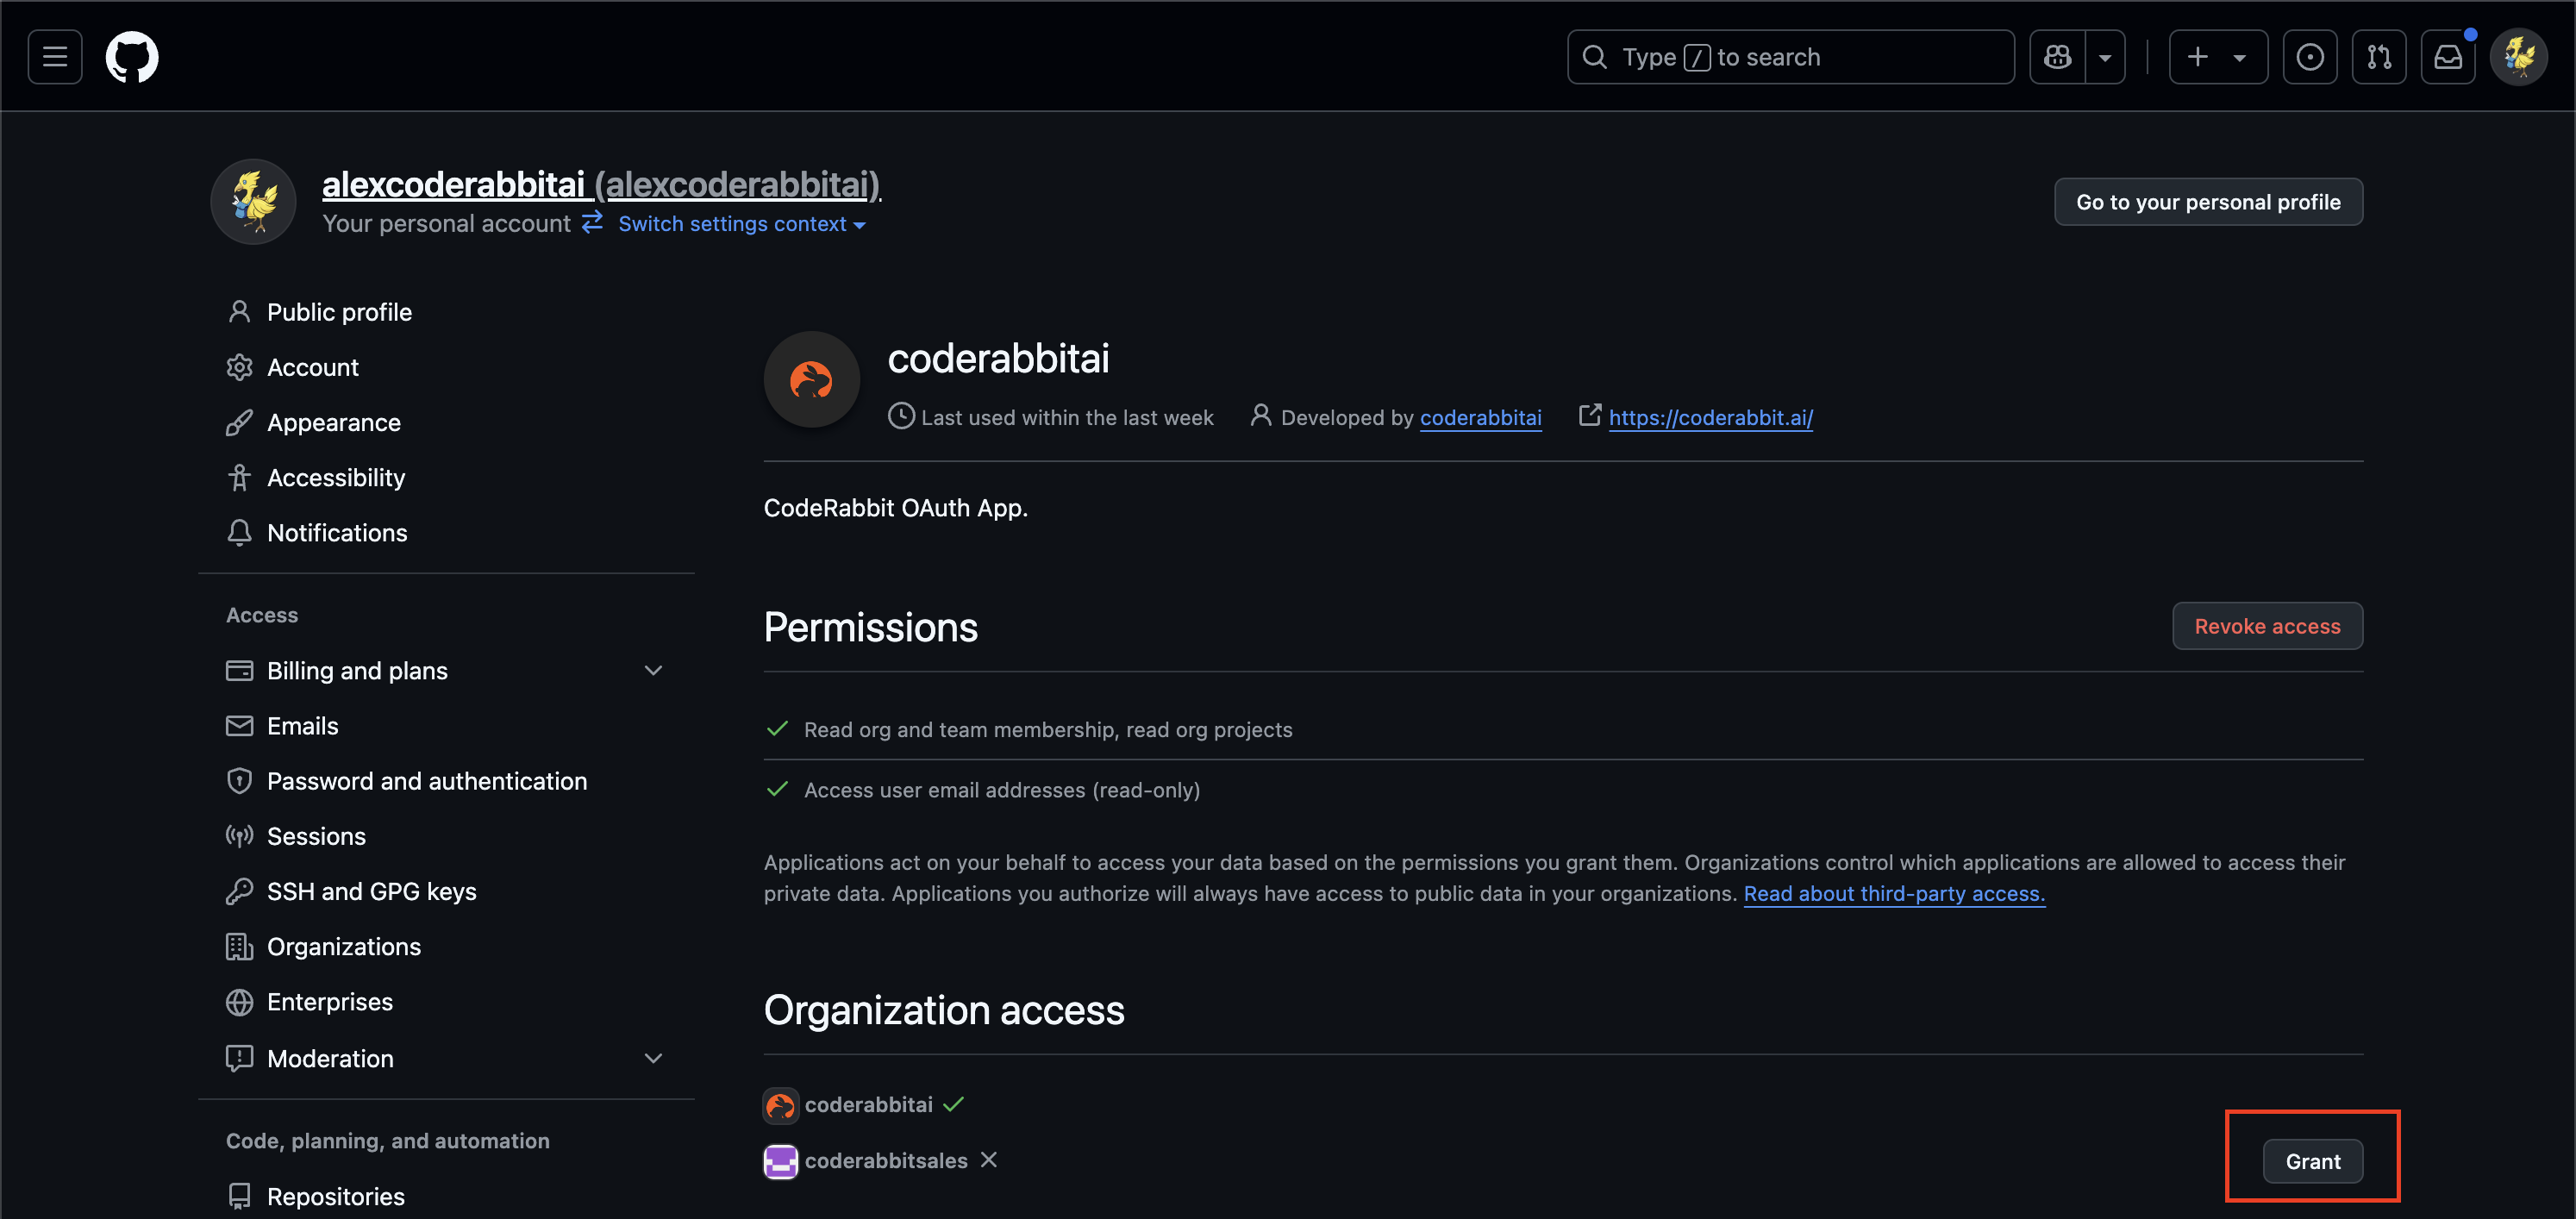 After granting CodeRabbit organization access, continue through the GitHub setup steps that CodeRabbit opens for the organization:
1. **Grant GitHub bot access** - Authorize CodeRabbit bot access on GitHub. This permission enables CodeRabbit write actions, such as opening pull requests or posting commit statuses, when a workflow requires them.
2. **Select repositories** - Choose which repositories CodeRabbit can access from the GitHub App repository-selection page.
## What permissions does CodeRabbit need?
When you grant CodeRabbit access to an organization, it receives the following permissions:
* **Read organization and team membership** - To understand your team structure
* **Read organization projects** - To access repositories for code review
* **Access user email addresses (read-only)** - For notifications and user identification
Organizations control which applications are allowed to access their private data. You may need organization admin approval to complete this process.
If you don't see the **Grant** button, contact your organization administrator to approve CodeRabbit's application request. An organization's IP allow list can also block access; see [GitHub troubleshooting](/platforms/github-com#troubleshooting).
After the organization is added, manage which repositories CodeRabbit can access from [Repository settings](/guides/repository-settings).
## What's next
Once you've successfully added your organization, you can:
* [Configure CodeRabbit](/getting-started/yaml-configuration) for your organization's specific needs
* [Manage your subscription](/management/subscription-management) to ensure adequate seats for your team
* [Set up repository-specific settings](/guides/repository-settings) for fine-tuned control
After granting CodeRabbit organization access, continue through the GitHub setup steps that CodeRabbit opens for the organization:
1. **Grant GitHub bot access** - Authorize CodeRabbit bot access on GitHub. This permission enables CodeRabbit write actions, such as opening pull requests or posting commit statuses, when a workflow requires them.
2. **Select repositories** - Choose which repositories CodeRabbit can access from the GitHub App repository-selection page.
## What permissions does CodeRabbit need?
When you grant CodeRabbit access to an organization, it receives the following permissions:
* **Read organization and team membership** - To understand your team structure
* **Read organization projects** - To access repositories for code review
* **Access user email addresses (read-only)** - For notifications and user identification
Organizations control which applications are allowed to access their private data. You may need organization admin approval to complete this process.
If you don't see the **Grant** button, contact your organization administrator to approve CodeRabbit's application request. An organization's IP allow list can also block access; see [GitHub troubleshooting](/platforms/github-com#troubleshooting).
After the organization is added, manage which repositories CodeRabbit can access from [Repository settings](/guides/repository-settings).
## What's next
Once you've successfully added your organization, you can:
* [Configure CodeRabbit](/getting-started/yaml-configuration) for your organization's specific needs
* [Manage your subscription](/management/subscription-management) to ensure adequate seats for your team
* [Set up repository-specific settings](/guides/repository-settings) for fine-tuned control